In the sidebar, Voice → Agents, and press create. Choose Aurora.You land straight in the editor — there’s no step-by-step wizard.
Each model shows its per-minute price
Name and description
In the top bar. Both are required — the agent won’t save without a description, even though only your team sees it.
Pick the engine model
First settings group, Select Engine Model. It’s the only one that starts open, because it’s required.Each option shows its price per minute, and that price feeds the estimate in the top bar.
Start with a cheaper model. You can change it later and compare the per-minute cost right in the list.
Language and voice
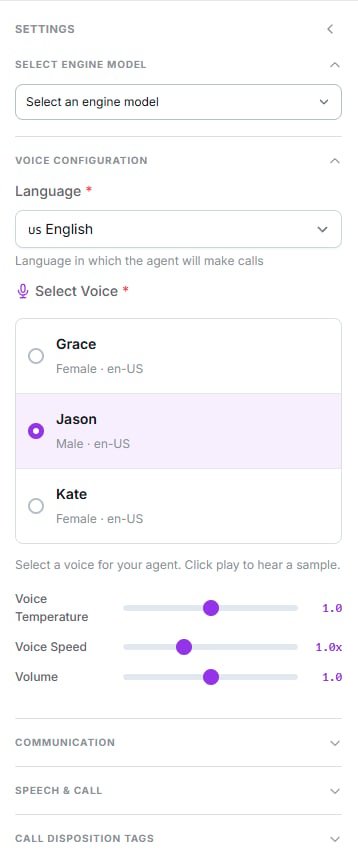
Voice Configuration group. Language first — there are four options: English, Spanish (Latin America), Spanish (Spain) and Multilingual.
Choose the language before the voice. Voices are filtered by language, and changing the language afterwards clears the selected voice.
Then the voice, from the list filtered by that language. Each card lets you play a sample.
Voice Configuration: language first, then the voice
Assign the number
Communication group. Pick the Phone Number.If the agent will receive calls, turn on Inbound Agent and set its schedule. See Voice, call and AI features.
Without a number the agent still saves, and you’ll see an amber notice: “The agent can be created, but it won’t receive or place calls until a number is set in Communication.”
Write the prompt
The centre column. It’s the only required content field, and where everything the agent needs to know and do goes — including the opening greeting.
The prompt and variables
How to structure it, templates, and per-customer personalisation.
Save
Press Create Agent. If something’s missing, the editor tells you and opens the settings group containing the error, ringed in red.The required fields are: name, description, engine model, language, voice and prompt.