

Before you start
A connected WhatsApp Business number. See Connect your account.
WhatsApp write permissions.
Default roles don’t include WhatsApp access. Only Admin and Super Admin have it. If
someone on your team can’t see the WhatsApp section in the menu, they need a custom role.
Steps
Open the editor
Chat → WhatsApp → Agents, then press Create agent. You land straight in the editor.
Name and description
In the top bar. Only your team sees the description.
AI model and language
First settings group, AI Model & Responses. It’s the only one that starts open.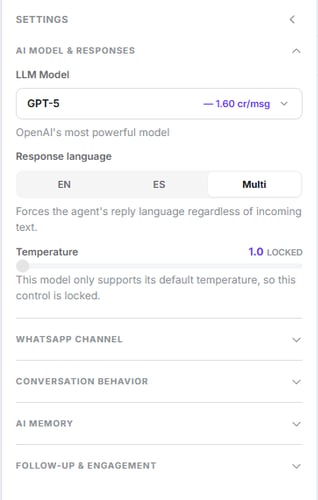
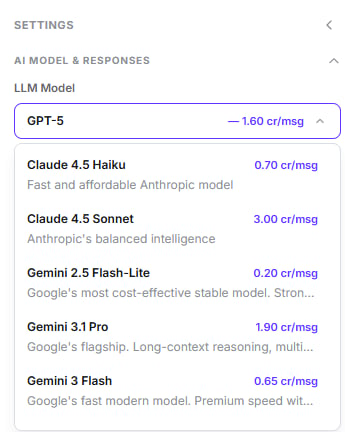
- LLM Model — determines cost per message and answer quality.
- Response language —
EN,ESorMulti. Forces the reply language regardless of what the customer writes in. - Temperature — lower is more predictable. Some models fix it and the control appears locked.
The settings column: the model group open, the rest collapsed
Every model is priced per message, in credits
Channel: number, type and routing
WhatsApp Channel group:
- WhatsApp phone number — required.
- Agent Type — Omnichannel, Inbound or Outbound.
- Routing — required for inbound and omnichannel. Either tick Default, or set a weekly schedule.
Channel, audience and behaviour
Full detail on routing and audience filters.
Write the prompt
The centre column. It’s the only required content field.
The prompt, FAQs and variables
How to structure and personalise it.
Check the Summary and save
The Summary tab lists what’s missing under Required to create: name, prompt, number
and routing.Press Create Agent. It goes live immediately.
Check that it works
Message the number from your phone over WhatsApp. You should see a reply within seconds and the conversation under CRM → Conversations. If it doesn’t reply, check the agent is Active, that routing covers the current time, and that the customer isn’t excluded by audience filters.Next step
The prompt, FAQs and variables
It replies. Now define exactly what it says.